- Graphics UI Wordpress
-
 March 17, 2026
 -
 Vinay Sahu
 -
 Reading time: 8 minute(s)
Table Of Content
- Web Design Image Optimization
- There are three main types of image optimization: file size, quality, and alt tags.
- File Size and Dimensions
- File Format and Compression
- SEO (Search Engine Optimization) Image Optimization
- Alt Tags
- Good Naming Conventions for Your Images
- Text-based Descriptions for Images
- Creating a Sitemap With Image Links
- Conclusion
- FAQs
Image optimization is important for web design and SEO, Seo are aware of the amount of time it takes to download a page and its size, so they rank websites with images higher if they use the right techniques. This guide will show you how to do basic image optimization and which tools you can use to make it easier.Images are an important part of any web design project — they help tell your story, create mood, and keep viewers interested in what you have to say. But there’s a lot more that goes into optimizing images than just throwing on a filter or uploading them as is to your site. The following guide will teach you how to optimize your images so that they look great on every screen and website, while also increasing their SEO ranking. The first step in optimization is to check the file size of your image. If the file is too large, you can use a tool like Google’s web compressor to reduce its size. If you’re using a photo editing software, it should have an option that allows you to change the dimensions. This will make sure that the image isn’t larger than what your screen or website can handle and will save bandwidth if your site uses images for navigation or other purposes.
 Optimizing your image files is a crucial step of web design and SEO. This includes choosing the right file format (JPEG or PNG) and compression.JPEG images are best when you want to preserve the natural colors of your photo and don’t need specific color modification for that particular project. They are also good for photographs.PNG images don’t lose any quality when they’re compressed, so they are great for logos and simple graphics. They also have more editing options than JPEGs.The compression should depend on the clarity of the original image — be less aggressive with photos that still have lots of detail in them (or else you might end up with blurry pixels), but be more aggressive with other images as it will make them smaller without reducing quality too much.
 Seo are aware of the amount of time it takes to download a page and its size, so they rank websites with images higher if they use the right techniques. This guide will show you how to do basic image optimization and which tools you can use to make it easier.There are two steps to optimizing your images for SEO : compression and file type. The first step is compression, which decreases the file size of an image without affecting its quality. Secondly, you should choose the right file type for your needs. You’ll want to be sure that your images are in either JPEG or PNG format — these formats allow for lossless editing and provide a high-quality image.
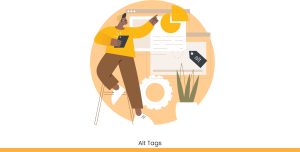
 Alt tags provide a text alternative to an image when it cannot be displayed and is not in a format that can be spoken. For example, if you have a photo of someone on your website, but the photo is not available for download as part of an audio slideshow, you will want to add an alt tag that provides a description of the photo. This way, if a user visually impaired visits your site and attempts to navigate it through a screenreader (software that reads aloud content), they will hear what the photo is about.
 When naming your images, it’s important to be as specific as possible. If you want an image of a person’s head, for example, don’t name it “image.jpg.” Name it something like “person-head-left-profile.jpg.” This way, when you upload your images to your website and they appear on a blog post, the URL will look cleaner and someone can easily tell what that image is just by looking at its name.
 The first key to optimizing images for your website is to include a text-based description for each image. This can be done with the “ALT” attribute in HTML. For example, you could use the following code:
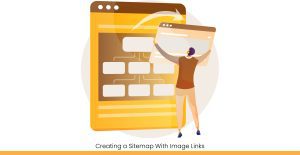
 One of the first steps you should take is to create a sitemap with all the images on your website. This will allow you to make sure that all of your image links are in the right spot and even see how many images you have. You can use any program that makes it easy to create a sitemap, but we’ve found Google Spreadsheets is one of the easiest and most effective tools for this step.Next, you want to make sure that all of your images are linked to somewhere meaningful. When creating a sitemap, make sure that there is a link on each page for every image on the page. If you have an image as part of a header or footer, it’s not necessary to include those links in your sitemap — just be sure they’re in place on the pages themselves.If you need help with where to put links for particular types of images, including product pictures, video thumbnails, or screenshots, check out this blog post with tips on where to find the right place for each type: https://www.fiverr.com/designerninja/set-up-image-links-for-your-website
 When you’re done with all the steps, you’ll have a website that not only looks good but performs well for your web visitors and for the search engine Optimizing your images for web design and SEO is a relatively small task that can make a big difference in your website’s success.All you have to do is follow the steps and you’re on track to optimizing your images for web design and SEO !
Web Design Image Optimization
There are three main types of image optimization: file size, quality, and alt tags.
File Size Image optimization starts with the file size. The larger the file size, the longer it will take to download. This is especially true for mobile devices where a large image can bog down your site or app and make it difficult for people to use. To optimize the file size of your images:- Make sure all photos are in a high-quality, jpg format - Decrease their resolution (this will reduce their file size) - Remove any unnecessary metadata from your photo - Convert them from RGB to sRGBQuality Quality refers to the amount of pixels an image has per inch. Larger resolutions have more pixels per inch and look sharper, but also take up more space on your site or app and require a better internet connection for viewing. You should use higher resolutions for images that you want viewers to stand close to and smaller resolutions for images that you want them viewing from farther away — like backgrounds behind text. To optimize the quality of your images:- Resize some images you think might be too big to be effective on certain screens - Reduce the resolution by shrinking their dimensions - Convert them from RGB to sRGBAlt Tags Alt tags are what show up when you mouse over an image on a website or in Google Images search results — they give important information about what’s in the picture so people know what they’re clicking on before they do itFile Size and Dimensions
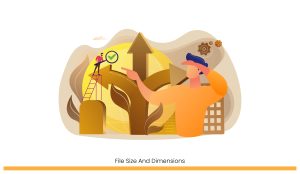 The first step in optimization is to check the file size of your image. If the file is too large, you can use a tool like Google’s web compressor to reduce its size. If you’re using a photo editing software, it should have an option that allows you to change the dimensions. This will make sure that the image isn’t larger than what your screen or website can handle and will save bandwidth if your site uses images for navigation or other purposes.
File Format and Compression
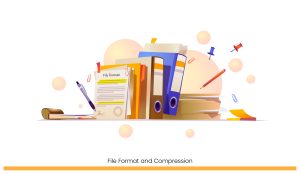 Optimizing your image files is a crucial step of web design and SEO. This includes choosing the right file format (JPEG or PNG) and compression.JPEG images are best when you want to preserve the natural colors of your photo and don’t need specific color modification for that particular project. They are also good for photographs.PNG images don’t lose any quality when they’re compressed, so they are great for logos and simple graphics. They also have more editing options than JPEGs.The compression should depend on the clarity of the original image — be less aggressive with photos that still have lots of detail in them (or else you might end up with blurry pixels), but be more aggressive with other images as it will make them smaller without reducing quality too much.
SEO (Search Engine Optimization) Image Optimization
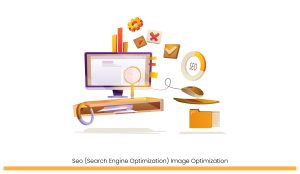 Seo are aware of the amount of time it takes to download a page and its size, so they rank websites with images higher if they use the right techniques. This guide will show you how to do basic image optimization and which tools you can use to make it easier.There are two steps to optimizing your images for SEO : compression and file type. The first step is compression, which decreases the file size of an image without affecting its quality. Secondly, you should choose the right file type for your needs. You’ll want to be sure that your images are in either JPEG or PNG format — these formats allow for lossless editing and provide a high-quality image.
Alt Tags
 Alt tags provide a text alternative to an image when it cannot be displayed and is not in a format that can be spoken. For example, if you have a photo of someone on your website, but the photo is not available for download as part of an audio slideshow, you will want to add an alt tag that provides a description of the photo. This way, if a user visually impaired visits your site and attempts to navigate it through a screenreader (software that reads aloud content), they will hear what the photo is about.
Good Naming Conventions for Your Images
 When naming your images, it’s important to be as specific as possible. If you want an image of a person’s head, for example, don’t name it “image.jpg.” Name it something like “person-head-left-profile.jpg.” This way, when you upload your images to your website and they appear on a blog post, the URL will look cleaner and someone can easily tell what that image is just by looking at its name.
Text-based Descriptions for Images
 The first key to optimizing images for your website is to include a text-based description for each image. This can be done with the “ALT” attribute in HTML. For example, you could use the following code:
Creating a Sitemap With Image Links
 One of the first steps you should take is to create a sitemap with all the images on your website. This will allow you to make sure that all of your image links are in the right spot and even see how many images you have. You can use any program that makes it easy to create a sitemap, but we’ve found Google Spreadsheets is one of the easiest and most effective tools for this step.Next, you want to make sure that all of your images are linked to somewhere meaningful. When creating a sitemap, make sure that there is a link on each page for every image on the page. If you have an image as part of a header or footer, it’s not necessary to include those links in your sitemap — just be sure they’re in place on the pages themselves.If you need help with where to put links for particular types of images, including product pictures, video thumbnails, or screenshots, check out this blog post with tips on where to find the right place for each type: https://www.fiverr.com/designerninja/set-up-image-links-for-your-website
Conclusion
 When you’re done with all the steps, you’ll have a website that not only looks good but performs well for your web visitors and for the search engine Optimizing your images for web design and SEO is a relatively small task that can make a big difference in your website’s success.All you have to do is follow the steps and you’re on track to optimizing your images for web design and SEO !
FAQs
Q1. Why is image optimization important for SEO?
Image optimization reduces file size, improves page load speed, and enhances user experience—factors that search engines consider when ranking websites.Q2. Which image formats are best for websites?
JPEG is ideal for photos, while PNG is best for graphics with transparency or text. Both offer good quality with optimized file size.Q3. What is the role of alt tags in image SEO?
Alt tags describe the image content to search engines and screen readers, improving accessibility and helping your images appear in search results.Q4. How can I reduce image file size without losing quality?
Use compression tools like TinyPNG or ImageOptim, resize large dimensions, and remove unnecessary metadata before uploading images to your site.Q5. What is the benefit of using image sitemaps?
An image sitemap helps search engines discover all your visual content, increasing the chances of your images appearing in Google Image search.The world’s First zero commission platform
Hire tech partners effortlessly
 If you're a non-tech founder looking for an agency or a tech founder looking for engineers.
 You can get your 5 best matches from 2800 in 5 mins, with 1000 data points tracked.
 Connect directly with no credit card needed!
You’re just a click away from the best talent.
About the author